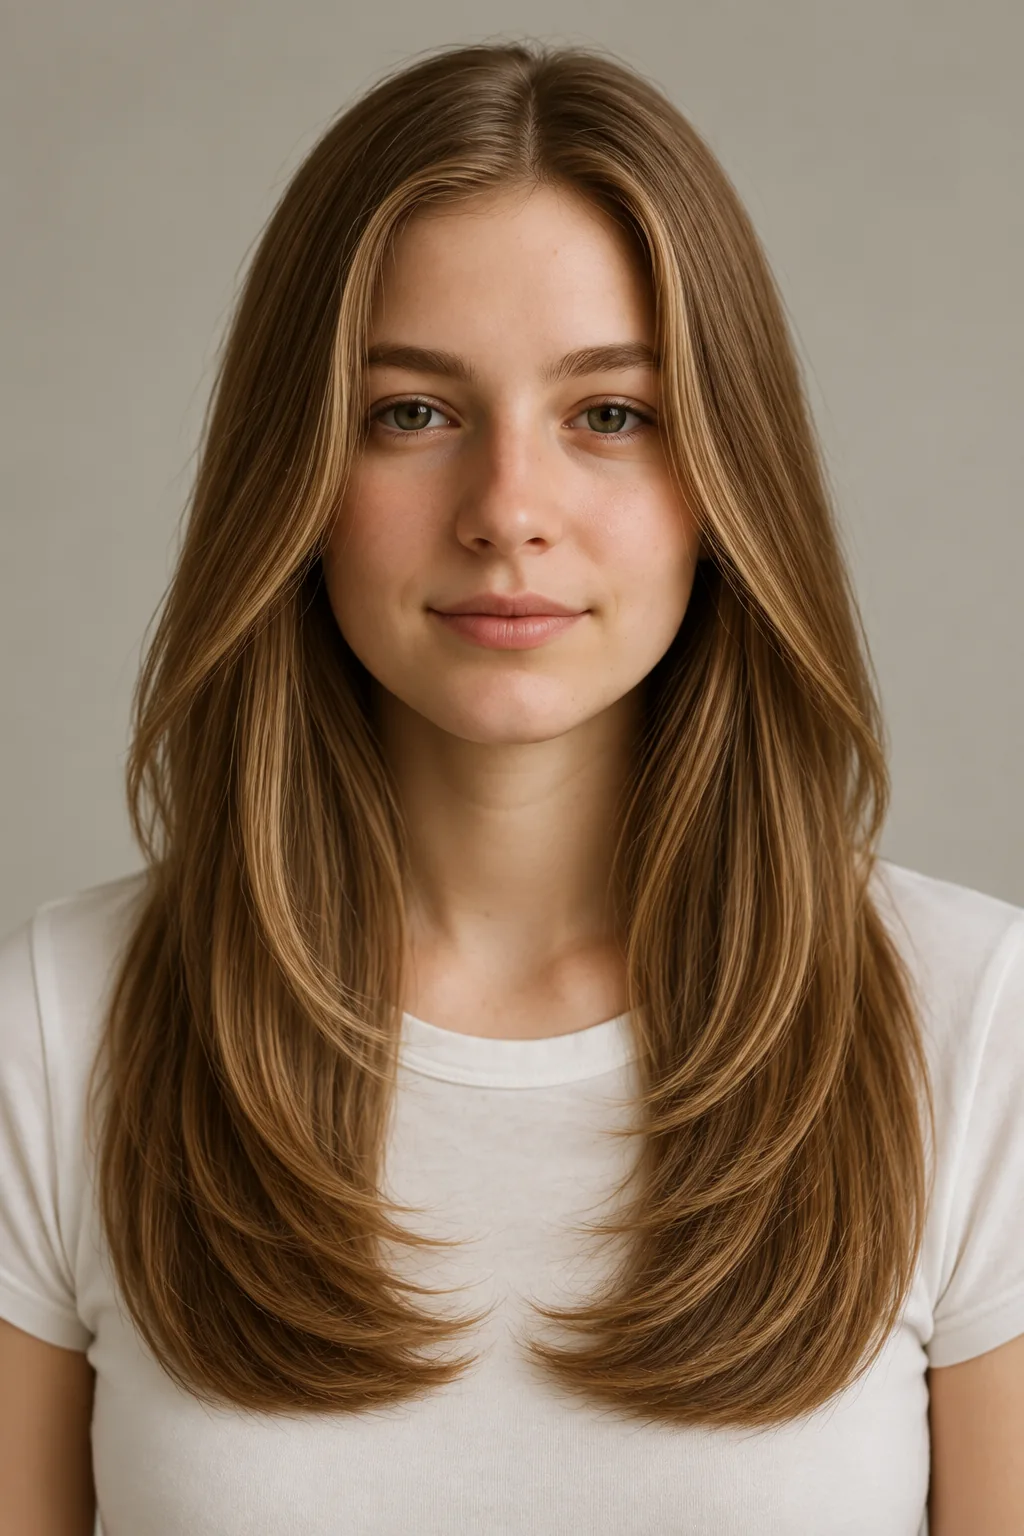
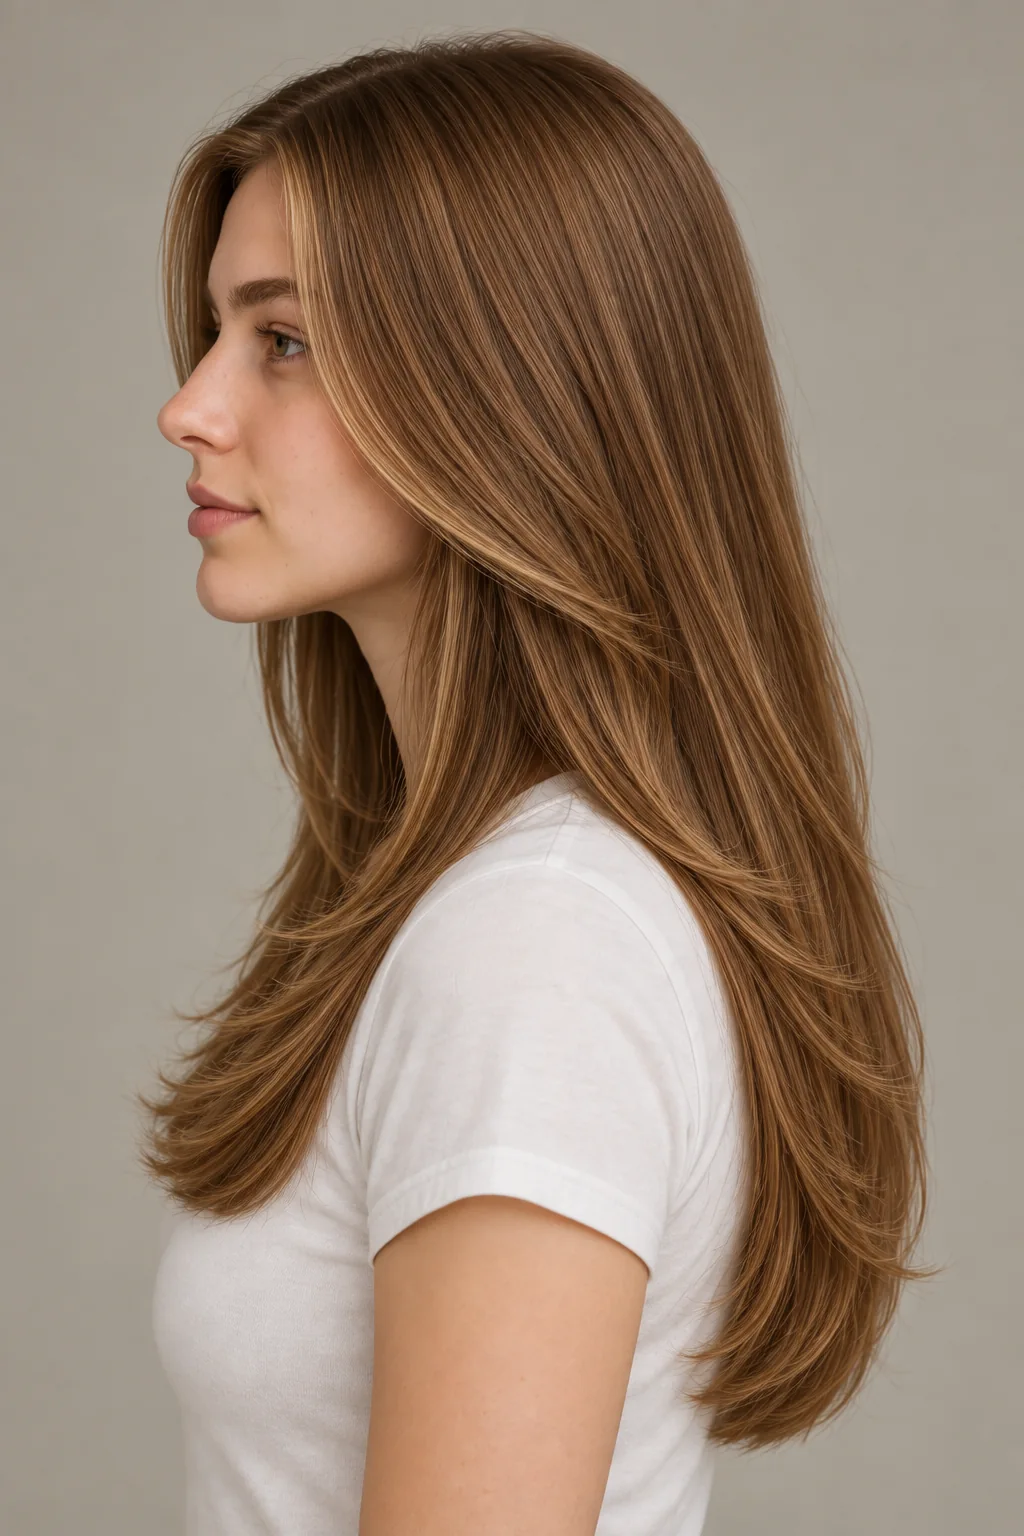
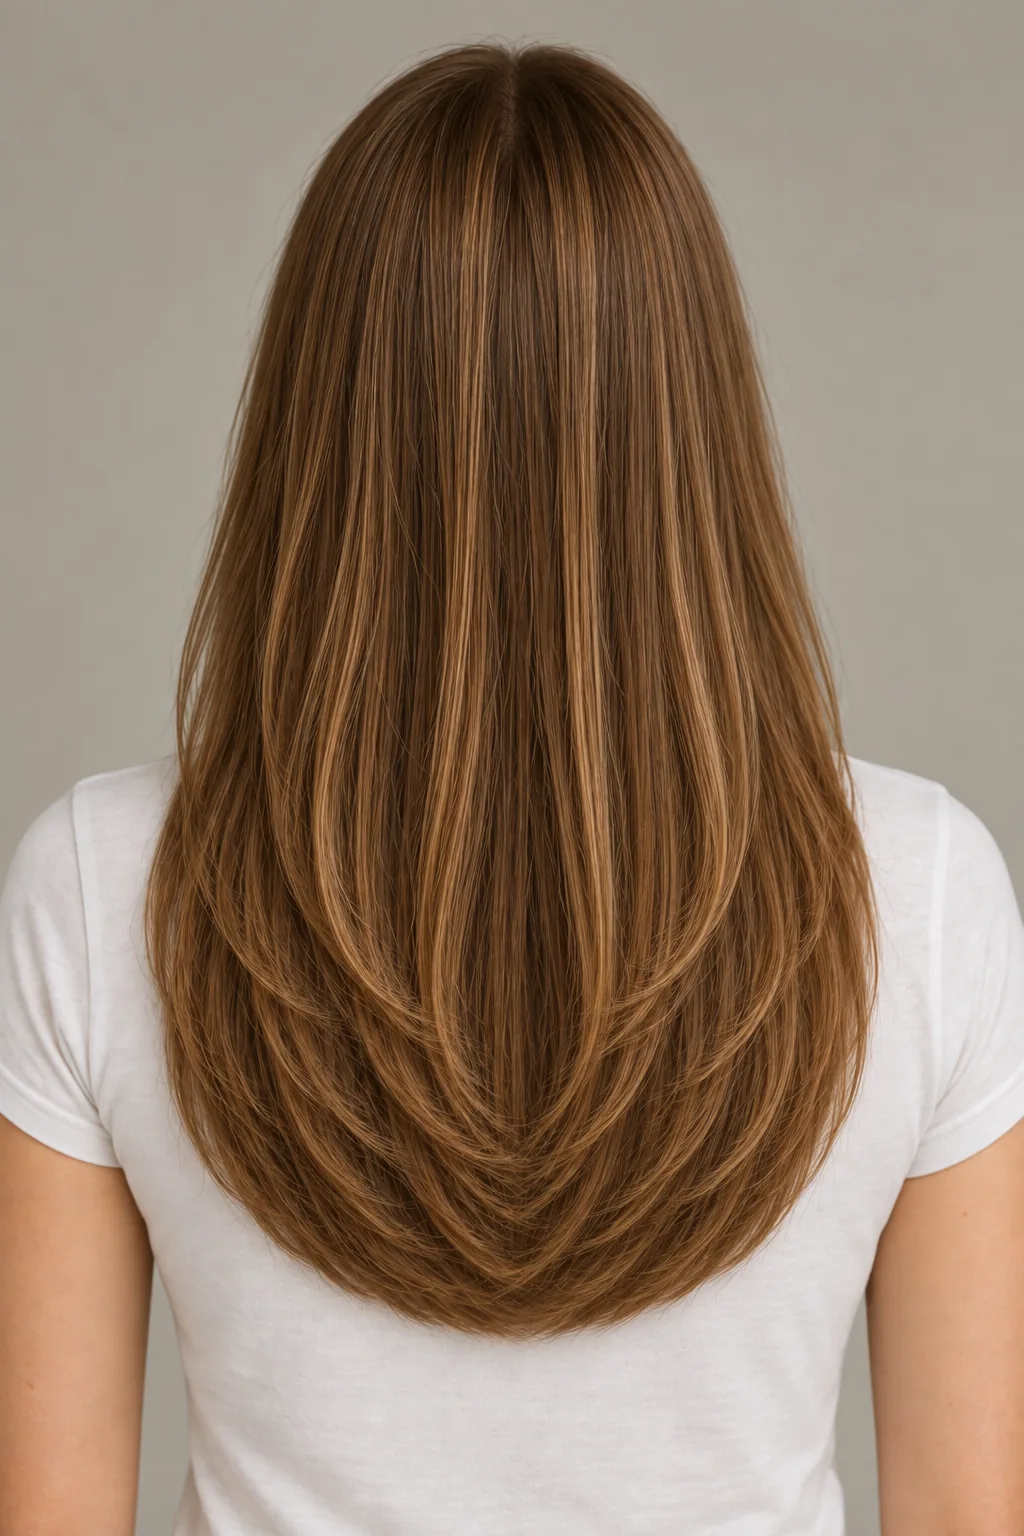
Define the curve from the back view
A U-shaped haircut keeps the center back longest and gradually shortens the sides into a rounded outline. This reference is chest-to-mid-back length, with a broad smooth curve and substantial ends. It does not finish in a sharp V point or a horizontal blunt line.
Begin the consultation with the rear photograph. Ask your stylist to show how deep the U would be on your hair: a shallow curve leaves the side and center lengths closer together, while a deeper one removes more length toward the sides. Both can be described as a U, so the name alone does not settle the decision.
Byrdie’s interviews with Raven Hurtado and Evalyn Lopez Benoit explain the longer center, shorter sides and distinction from a pointed V. Bring an image of the actual curve you prefer, then agree where its endpoints should sit before cutting.
The perimeter and the layers are separate choices
The U describes the outside edge. Layers describe shorter lengths inside that outline. This version combines the curve with long, low, blended layers, but choosing a rounded back does not require short crown pieces or heavy thinning throughout the hair.
Ask your stylist to describe the two decisions separately: how the back line will be shaped, and where the shortest internal layer will begin. If you want a full lower edge, say so before agreeing to additional movement. The amount of layering should leave enough density to support the outline you want.
| What matters to you | What to specify |
|---|---|
| A quiet crown | Keep upper sections long rather than adding short layers for lift. |
| Full ends | Show how much hair remains at the perimeter after layering. |
| Long face framing | Agree a starting point below the chin near the collarbones. |
| A rounded rather than pointed back | Compare the rear curve directly with the reference. |
| Less weight through dense lengths | Discuss where internal adjustment is needed without thinning every area. |
Keeping the center long is only half the agreement
A stylist can preserve the longest center length while still taking a noticeable amount from the sides. If those side pieces matter for your ponytail or the way the hair rests over your shoulders, mark their minimum length too.
The front framing in this reference stays long, beginning below the chin around the collarbone area. It is not a short curtain fringe. Ask to see the shortest proposed front piece without a styled bend so you understand its actual reach.
Try your normal tie position and an ear tuck before those sections are finalized. The center hanging far down the back does not guarantee that every front and side piece reaches the same tie. A shallower U or longer front frame may be the practical compromise you prefer.
Choose what you want to preserve
You can make the curve shallower, protect the center length or retain more weight at the bottom. Select your priorities below. These requests go to your salon card and do not change the reference used for the AI preview.
Judge the rounded outline after your hair dries
The smooth reference makes the perimeter easy to trace, but your natural bends can change its visible position. Waves or curls may shorten the sides and center by different amounts, so assess the whole rear shape dry rather than relying only on stretched length.
For a curly or coily version, plan the curve in your normal pattern. You do not need to straighten your hair to choose a U-shaped outline. Bring a photograph of the rear in its usual dry state if that is easier than describing where it lifts or separates.
If one side waves more strongly, discuss whether you want to follow that natural variation or style toward a more even-looking finish. An apparent difference in the ends does not always mean one side was cut incorrectly. The aim is an outline you like in the way you intend to wear it.
Keep the finish quieter than the shape decision
This reference uses slight inward bends to reveal the low layers. A full blowout is not what defines the U. Ask your stylist to show the back with minimal shaping as well, so a curl at the ends does not hide the actual line you are agreeing to.
If you want the smoother finish, discuss how to guide the long sections with the tools you normally use. Follow tool instructions and use appropriate heat protection when applying heat. If you prefer air-drying, assess that result rather than assuming a cut will change your texture.
Maintain the curve—or plan a different outline
As the hair grows, the longest center and shorter sides remain different lengths. Refresh the curve when it no longer sits where you like or when the ends need attention. Agree the amount removed from each area rather than assuming a routine trim takes the same amount everywhere.
If you later want a straighter baseline, you can let the sides gain length while selectively maintaining the center, or shorten the center sooner to bring the endpoints closer. The first route protects more overall length; the second changes the outline faster but removes more from its longest part.
If you want fewer internal layers as well, preserve those shorter sections instead of repeatedly recutting them. Changing the perimeter and growing out layers are related but distinct goals, and your stylist needs to know which matters most.
Name the side endpoint as clearly as the center
I want a long rounded U-shaped back, with the center longest and the sides gently shorter. Keep the edge full, the internal layers low and the face framing near the collarbones. Show me both endpoints before cutting so I understand how much length will leave the sides.
Include a rear photograph with your front reference. The rear view establishes the U; the front helps agree framing and tie-back reach.
Prepare my U-shaped haircut salon card →Questions about the rounded perimeter
Is a U cut the same as a V cut?
No. This reference has a broad rounded curve. A V concentrates the longest point into a sharper tip. Show the rear image to avoid relying on either letter alone.
Does a U shape require layers?
No. The perimeter and internal layering can be chosen separately. This particular version includes low blended layers, but you can discuss a less layered variation.
Will it make my ends thicker?
It does not add hair. The retained density and amount removed from the sides determine how substantial the edge looks. Ask to compare that tradeoff before cutting.