
Decide on two haircuts at once
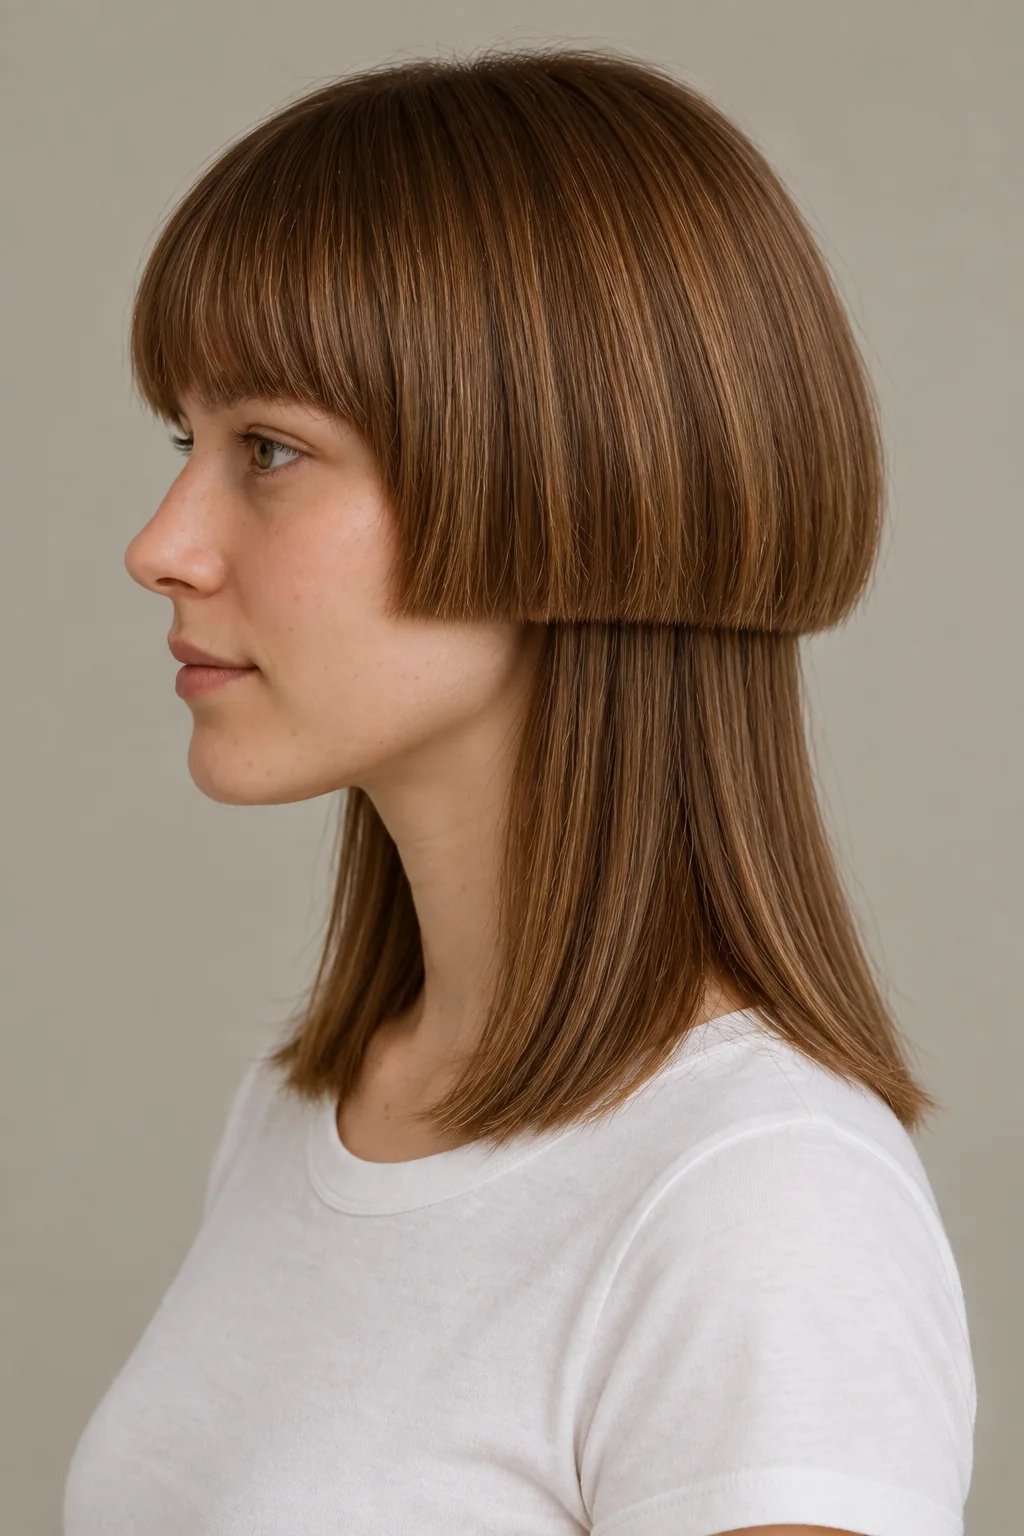
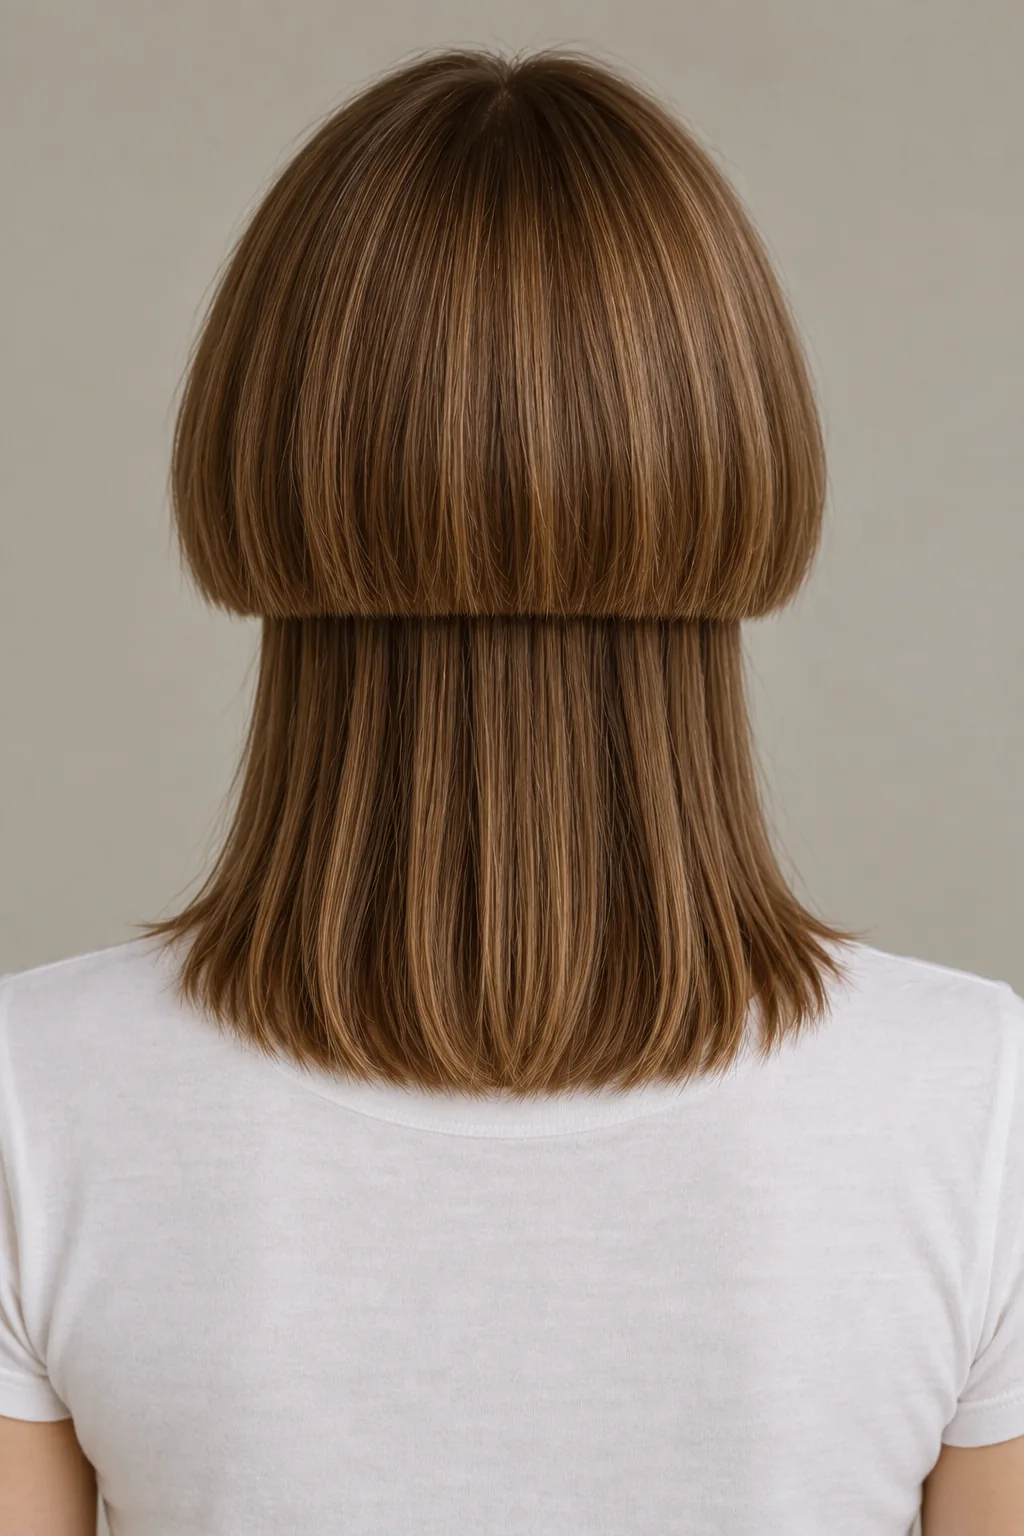
A medium-length jellyfish haircut combines a short, rounded upper shape with a separate longer layer underneath. In this version, the cap ends around the lower cheeks and the lower lengths reach the collarbones. The short section continues around the back; it is not just a pair of short pieces beside the face.
Before cutting, ask your stylist to indicate both outlines while you look straight ahead and in profile. Moving the cap higher makes more of the lower layer visible. Bringing the two edges closer creates less contrast. Your neck length, the way your hair sits on your shoulders and your preferred silhouette are more useful here than a rule about which face shape is allowed to wear the cut.
Davines describes the jellyfish structure as a rounded short upper section over visibly longer lengths. Bring the side and back references to your consultation: a front photograph alone can hide how far the cap extends.
Reserve enough hair for the lower tier
The two outlines share the same head of hair. Taking a very large section into the cap can leave little density underneath, particularly if your ends already look sparse. Ask your stylist to section the proposed tiers before cutting, so you can see what will remain long.
Fine strands and low density are not the same thing. The practical question is whether your lower section has the fullness you want once the upper section is lifted away. Heavy thinning is not automatically needed to create the separation—the difference in length already does that work.
| What to check | Why it matters for the two tiers |
|---|---|
| Sparse or fragile-looking ends | Keeping more hair in the lower section may give it a clearer outline. |
| A dense, heavy upper section | The cap may need controlled internal weight so it curves rather than sitting as a solid shelf. |
| Waves that flip at the cheeks | The upper edge may turn outward instead of following the smooth reference. |
| Curls or coils | The upper and lower sections can shrink differently; agree their dry positions separately. |
| Strong crown growth patterns | The rounded cap may need a different length or drying routine to settle. |
| Hair that bends on the shoulders | The lower tier may kick outward at this length, even when the cap stays rounded. |
Change the balance before changing the whole idea
You can ask for a longer cap, a fuller lower section or a smaller difference between the two cut lines. These are consultation decisions, not automatic changes to the AI preview. Select the points you want to carry into your salon card.
Style the cap and lower lengths separately
The reference has an inward curve in the upper tier and a straighter fall underneath. Trying to brush both sections together can blur that distinction. Ask your stylist to show you how to separate them while drying, including where to place the brush at the cap’s edge.
Davines’ styling guidance suggests a round brush for the upper shape and a paddle brush for longer sections. The useful lesson is to give each tier its own direction, rather than buying a particular tool without understanding the result. If you use heat, follow the tool instructions and use suitable heat protection.
For air-drying, assess both sections in your usual texture. A wavy or curly jellyfish can be intentional, but the relative shrinkage and movement will change the gap. Do not use a smooth AI reference as evidence that your own hair will dry into the same curve.
A ponytail does not collect the whole haircut
The collarbone-length lower tier may reach a low tie, depending on the tie position and your proportions. The cheek-length cap and bangs generally remain loose. If you need everything away from your face for exercise, work or sleep, test clips or a headband as part of the consultation.
Ask to see what the cut looks like with just the lower tier tied back. It can resemble a short bob from the front, but the loose cap may still move against your cheeks. This is a different daily experience from a one-length haircut that fits into a single ponytail.
Maintain the step—or plan what comes after it
Book a reshape when the cap loses the outline you like, the bangs interfere with your routine or the gap between the tiers changes more than you want. Published trim intervals vary: Gusto’s salon guide emphasizes regular maintenance. Agree a schedule around your growth and preferred sharpness instead of treating one interval as a requirement for everyone.
If you stop wanting the two-tier shape, there are two main directions to discuss:
- Move toward a bob: shorten the lower tier toward the cap. This removes the long section, so preview the resulting overall length before agreeing.
- Keep more length: let the cap grow, then gradually connect the levels. Softening the edge can help the transition, but it changes the deliberate separation and cannot instantly replace missing length.
The choice affects how your haircut looks between appointments. Discuss it before cutting if preserving overall length is important to you.
Explain where the short tier stops
I’d like a rounded short upper tier that wraps around my head, straight bangs and a separate collarbone-length layer underneath. Please show me both dry outlines and how much hair will remain in the lower section. Keep the separation clear, and demonstrate styling the tiers separately.
Use all three references together. The front establishes bangs and balance; the side shows the gap; the back confirms that the cap continues around the head. Your stylist should adapt sectioning and weight to your real hair rather than reproduce a photograph as a fixed cutting diagram.
Prepare my jellyfish haircut salon card →Questions about the two-tier shape
How is a jellyfish haircut different from a wolf cut?
This jellyfish reference has two distinct outlines: a compact short cap and a longer section beneath it. A wolf cut is generally read through shaggy layering and a more blended transition from shorter volume to longer ends. Ask to compare the back views if the names are being used loosely.
Is this the same as a hime cut?
The key difference here is at the back. A hime reference may have short cheek panels with a longer back; this jellyfish cap continues around the head. Showing the rear view helps avoid getting only short front panels when you wanted a full upper tier.
Does it suit a round face?
There is no universal yes or no. The cap’s height and width change where the silhouette looks fullest, while the lower tier adds a separate vertical line. Compare those proportions on yourself and discuss what you prefer to emphasize rather than relying on a face-shape label.
Is it high maintenance?
Keeping a very smooth, rounded cap over straight lower lengths can require separate styling and regular reshaping. A version designed around natural texture may involve a different routine. Ask for a demonstration that you are willing to repeat, including what the cut looks like on a day when you skip it.
Can the lower section be shoulder length instead?
Yes, but shortening it reduces the visible gap below the cap. Have your stylist show both outlines together so the result still has the degree of separation you want. The reference on this page keeps the lower tier at the collarbones.