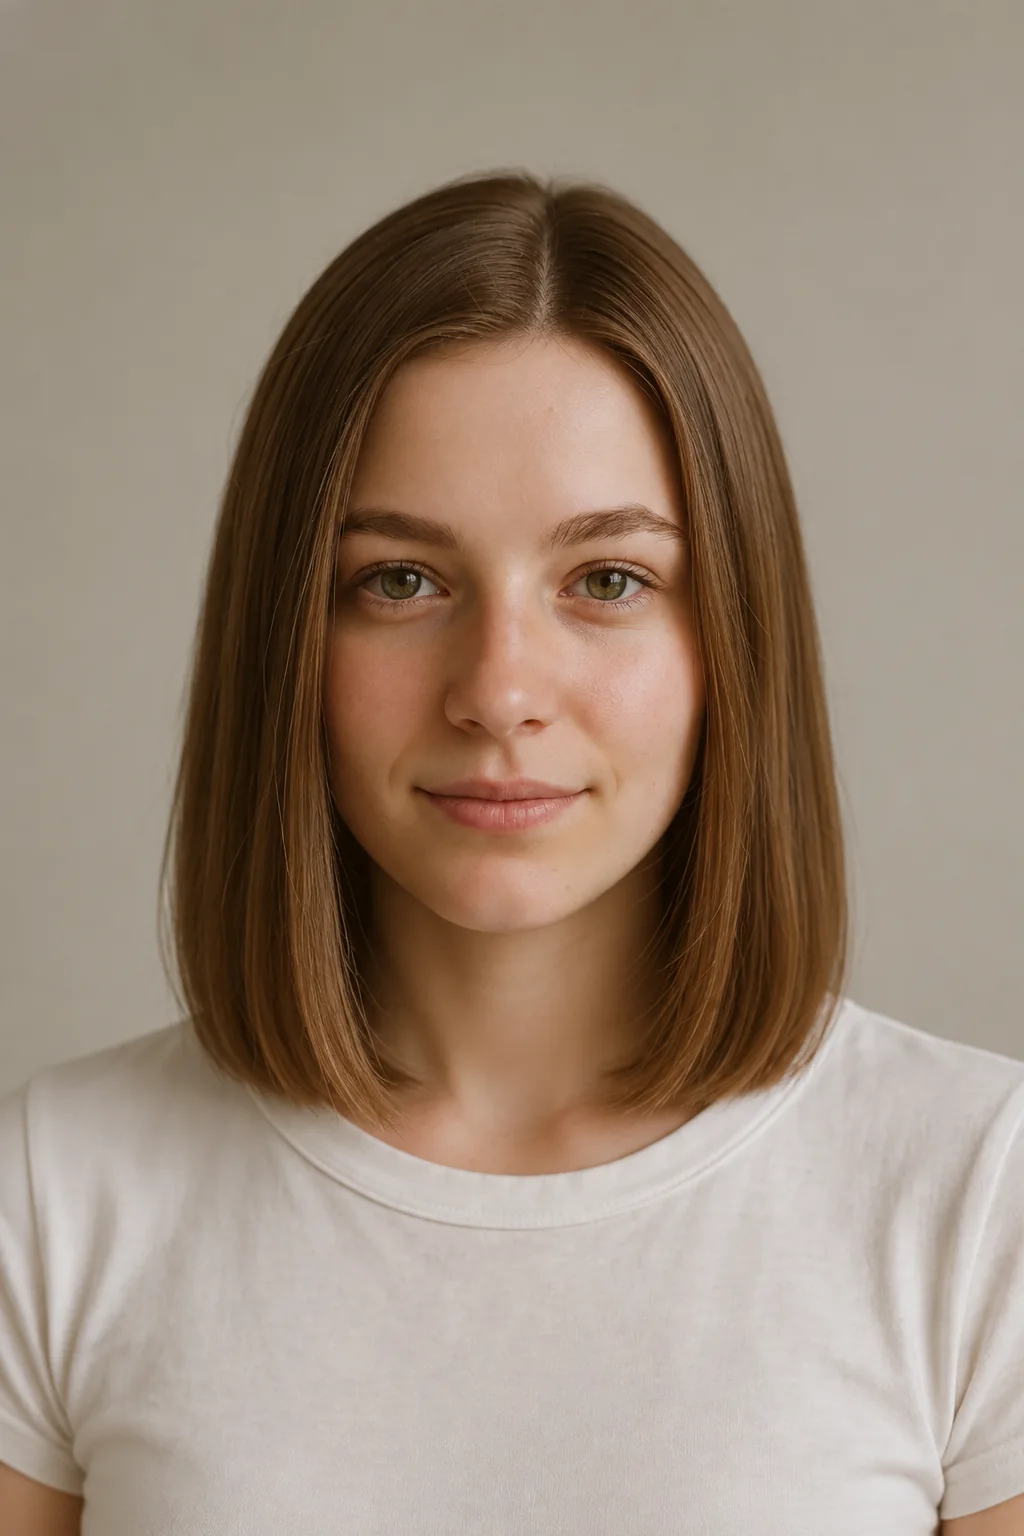
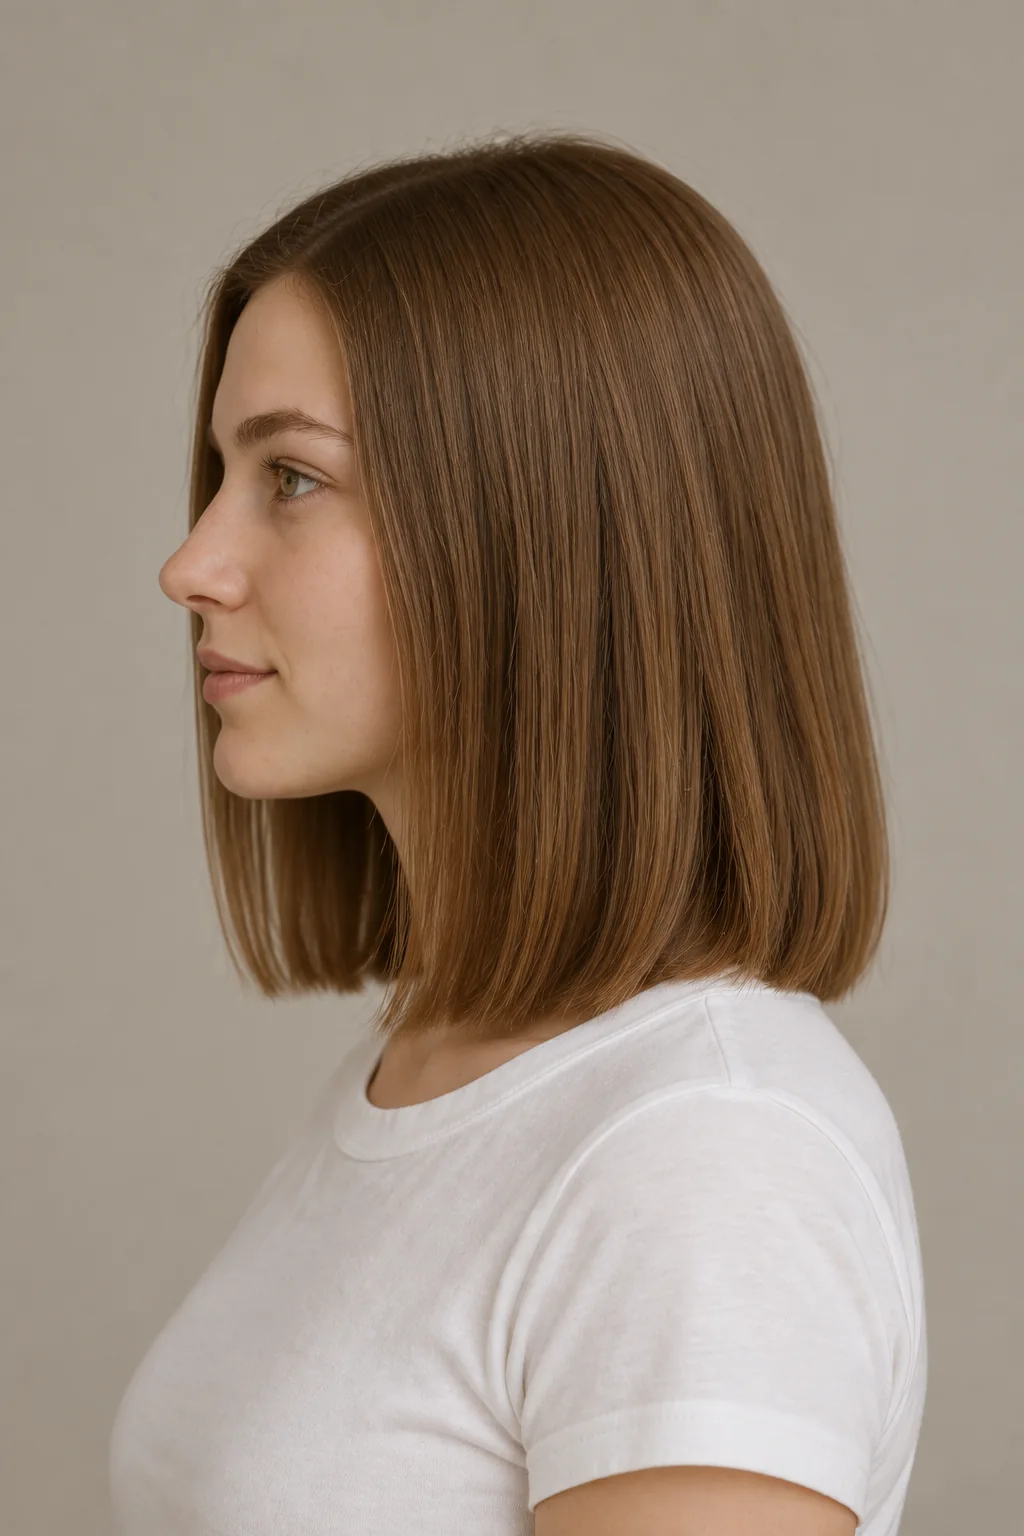
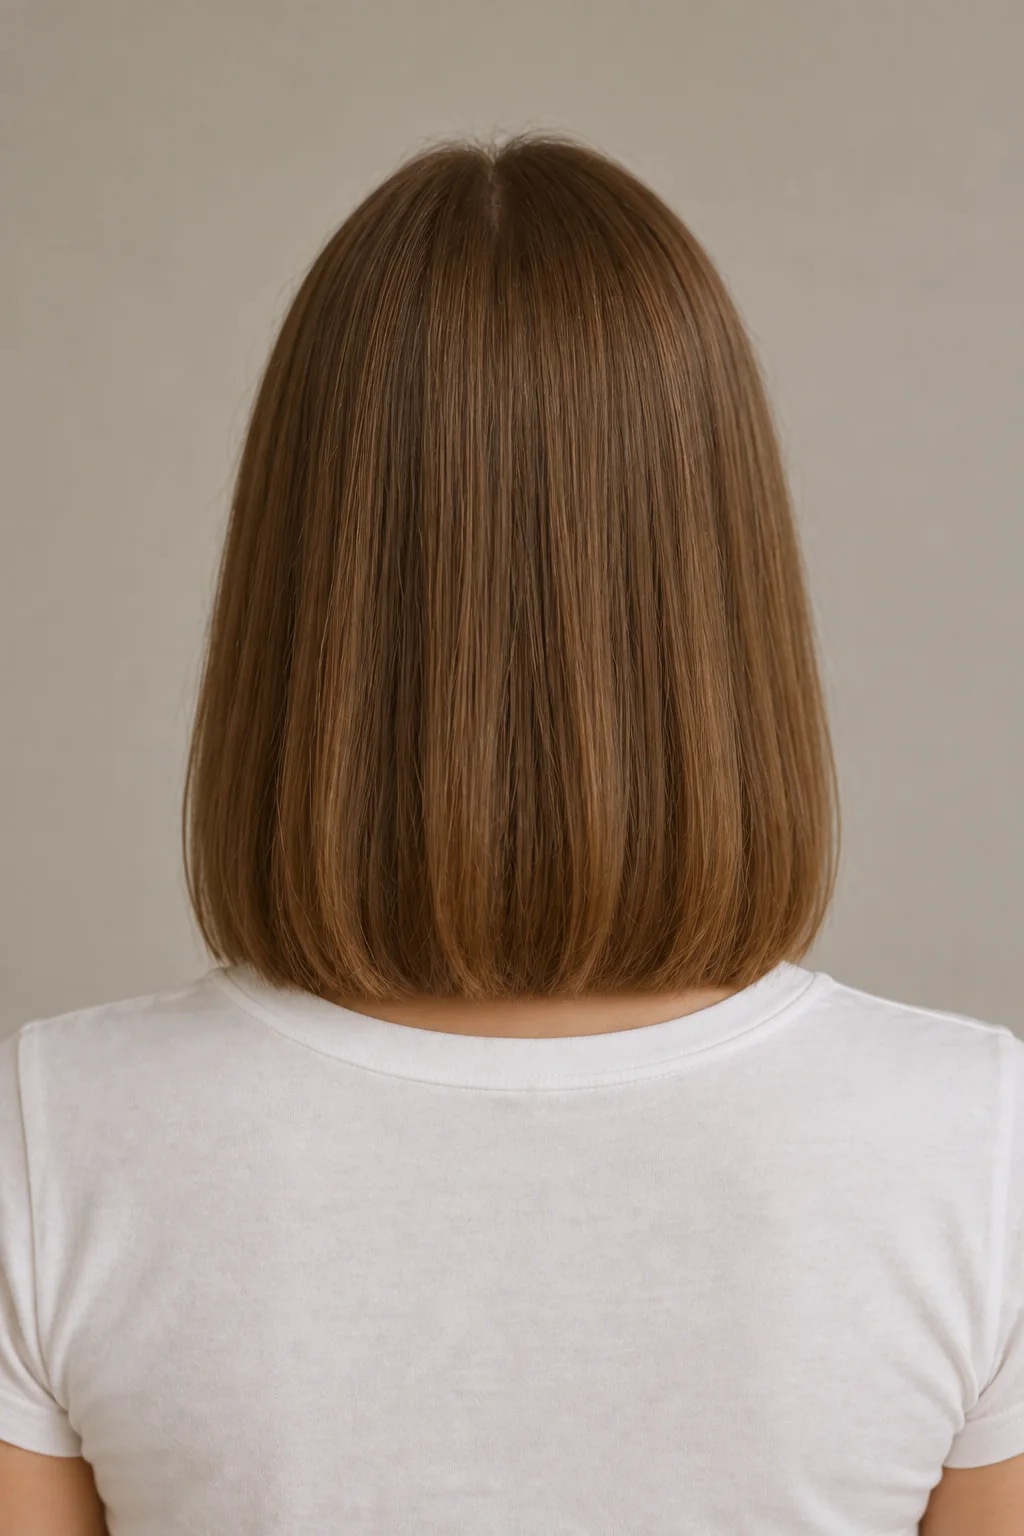
Choose the landing point, not just “medium length”
A clavicut takes its name from the collarbone. That describes a length rather than one compulsory set of layers or bangs. The version here is smooth and center-parted, with long front pieces, no fringe and a full, mostly one-length edge. It is a useful reference if you want to shorten your hair without adding prominent face-framing layers.
InStyle’s interviews with stylists David Reid and Gina Rivera describe the collarbone target and how layering can be adapted to density. For your appointment, point to where you want the dry ends to land. “Just above,” “touching” and “just below” the collarbone can look different, especially from the side.
Check the proposed line with your head in its normal position. Look down and turn your head too, so you understand how the hair moves. A precise photograph is helpful, but your shoulders, neck and natural texture determine where that length sits on you.
Decide how much weight belongs at the edge
The reference has a substantial outline. It does not depend on many short layers to create its shape. If your ends already look sparse, ask what will remain at the perimeter before agreeing to thinning or texturizing throughout the cut.
Thick hair raises a different question: can weight be adjusted inside the shape while the visible edge stays full? Marie Claire’s stylist interviews discuss blunter edges for finer hair and selective layering for denser textures. Neither means every client needs the same sectioning.
| Your starting point | A useful consultation check |
|---|---|
| Fine strands or a sparse lower edge | Whether fewer, longer layers keep enough fullness at the perimeter. |
| Dense hair that feels heavy | Where internal weight could be reduced without hollowing out the ends. |
| Existing short front layers | Which pieces can reach the new outline now and which must grow. |
| Natural waves | Where the ends land after the wave dries, rather than when stretched straight. |
| Curls or coils | The dry target after shrinkage and how the overall shape distributes volume. |
Keep the idea, adjust the practical details
You can keep more weight, soften the edge slightly or leave a little extra length for tying back. These requests help your stylist adapt the reference. They travel to the salon card and do not modify the AI preview.
The shoulders can change the finish
At this length, the ends may rest against your shoulders and turn outward. That does not automatically mean the cut was done incorrectly. Notice whether the bend appears only on one side, after changing your parting or when wearing a high collar.
Ask your stylist to show how the outline behaves before deciding to shorten it again. Removing a little length can change where it makes contact, but also moves it away from the original collarbone target. You may prefer to keep the length and accept some movement rather than repeatedly heat-style the ends into a perfectly straight line.
Agree on the finish you will actually repeat
For the smooth reference, ask for a demonstration of how to guide the lengths while drying without creating a strong inward curl. Your texture determines how much work that takes. Follow styling-tool instructions and use suitable heat protection if heat is part of your routine.
If you air-dry, bring a photograph of that finish to the consultation. Plan the length around your natural bends or curls, including how the front dries compared with the back. Collarbone length alone does not make a haircut wash-and-go; the practical test is whether you like its shape on the days you do less.
Test the ponytail you normally wear
Long front sections make this version different from a cut with short cheek layers, but they do not guarantee that every piece reaches every ponytail. A high tie needs a different reach from a low one. Test yours before deciding the final length.
Check an ear tuck as well. If you work with your hair behind your ears, that arrangement matters as much as the centered front view. Tell your stylist which loose pieces you are comfortable clipping and which you need to gather into the tie. Keeping a little extra length can be a practical choice, even if the ends then sit just below the collarbone.
Maintain the target or let it become a longer cut
Growth gradually moves the edge below the collarbones and changes how it rests on your shoulders. Refresh the length when you miss the shorter balance or the ends need attention. Ask your stylist for an interval based on your growth and preferred outline rather than treating the haircut’s name as a fixed schedule.
If you want to grow it out, the mostly one-length structure gives you a clear direction: retain the length and avoid adding short sections you would immediately want to regrow. Existing layers may still need time to meet the perimeter. A trim can tidy the edge, but cannot make those pieces catch up instantly.
Ask for a dry-length check
I’d like a collarbone-grazing cut with a center part, no bangs and long front pieces. Keep the perimeter full and the layers minimal. Please check the finished length in my natural texture and show me whether the pieces I need will reach my usual ponytail.
Use all three views to agree the outline. Describe how you dry and wear your hair, and point out any existing short layers. Your stylist can then separate what can be cut now from what needs to grow.
Prepare my clavicut salon card →Questions about collarbone length
Is a clavicut the same as a lob?
The terms overlap. A lob describes a longer bob, while clavicut specifies a collarbone target. Agree the actual length, edge and layering rather than relying on either name alone.
Does it have to be straight or center-parted?
No. Those features describe this reference. A collarbone cut can be planned for another parting or natural texture, but that will change the silhouette shown here.
Will it make fine hair look thicker?
A full edge can retain more visible density than heavily layered ends, but it does not add hair. Ask your stylist to assess your existing layers and density before deciding how much to remove.
Do I need bangs?
This version has none. Adding bangs is a separate decision that changes the front view and daily routine. Try the long-front outline first if keeping your hair easy to tuck or gather is a priority.