Choose how much of the contrast you actually want
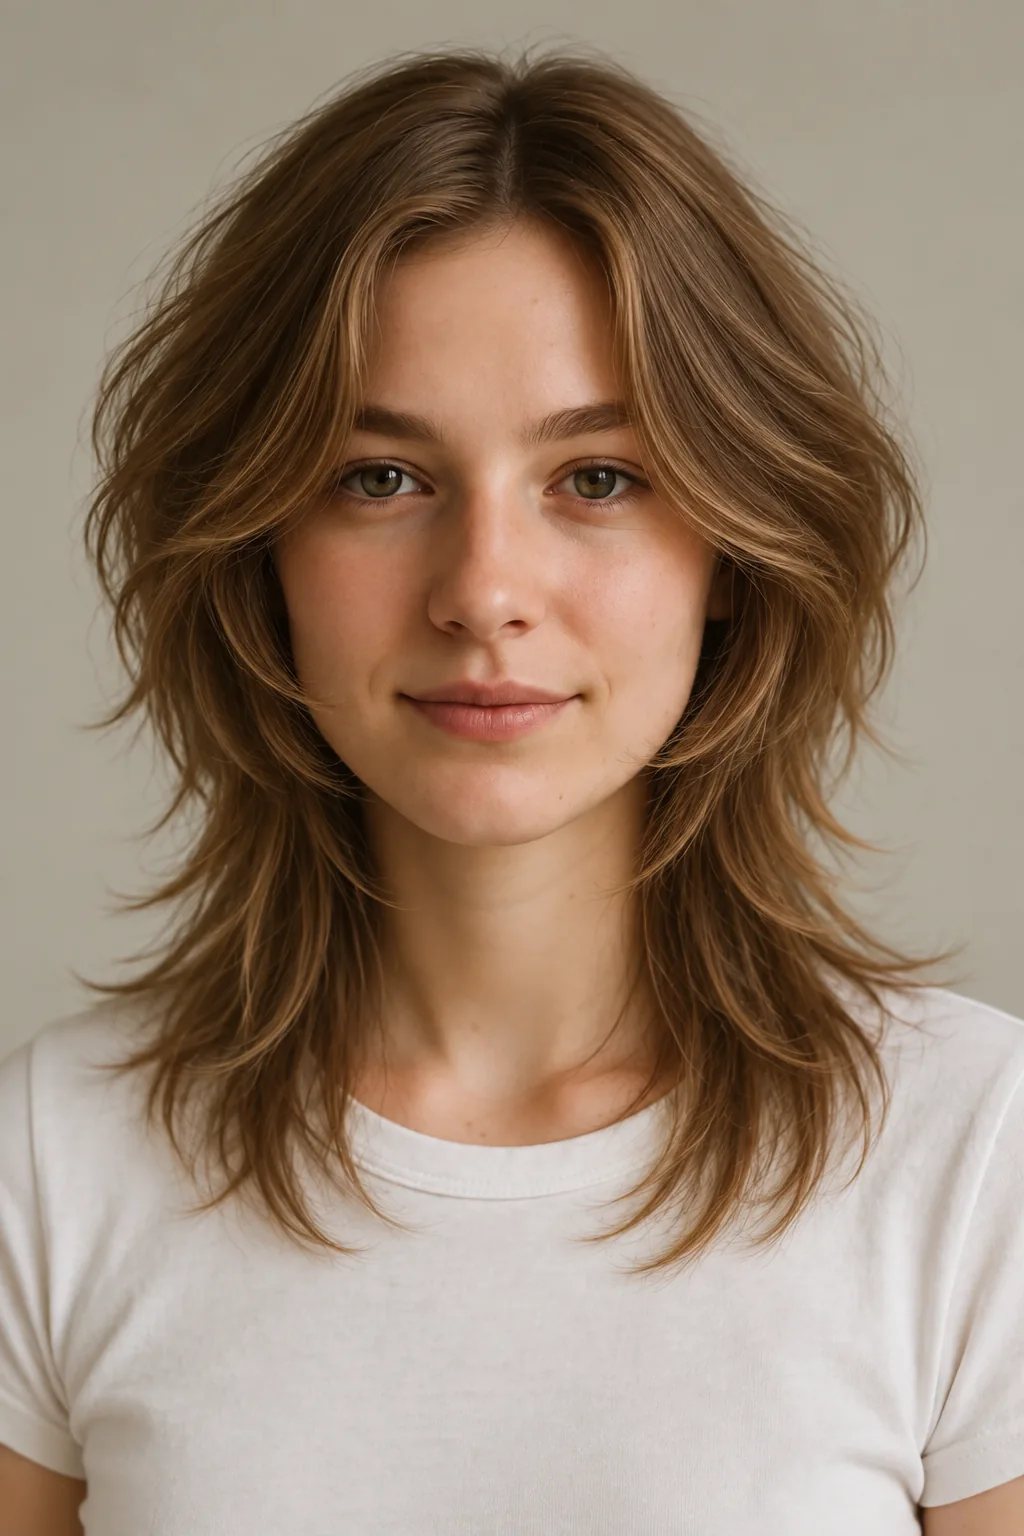
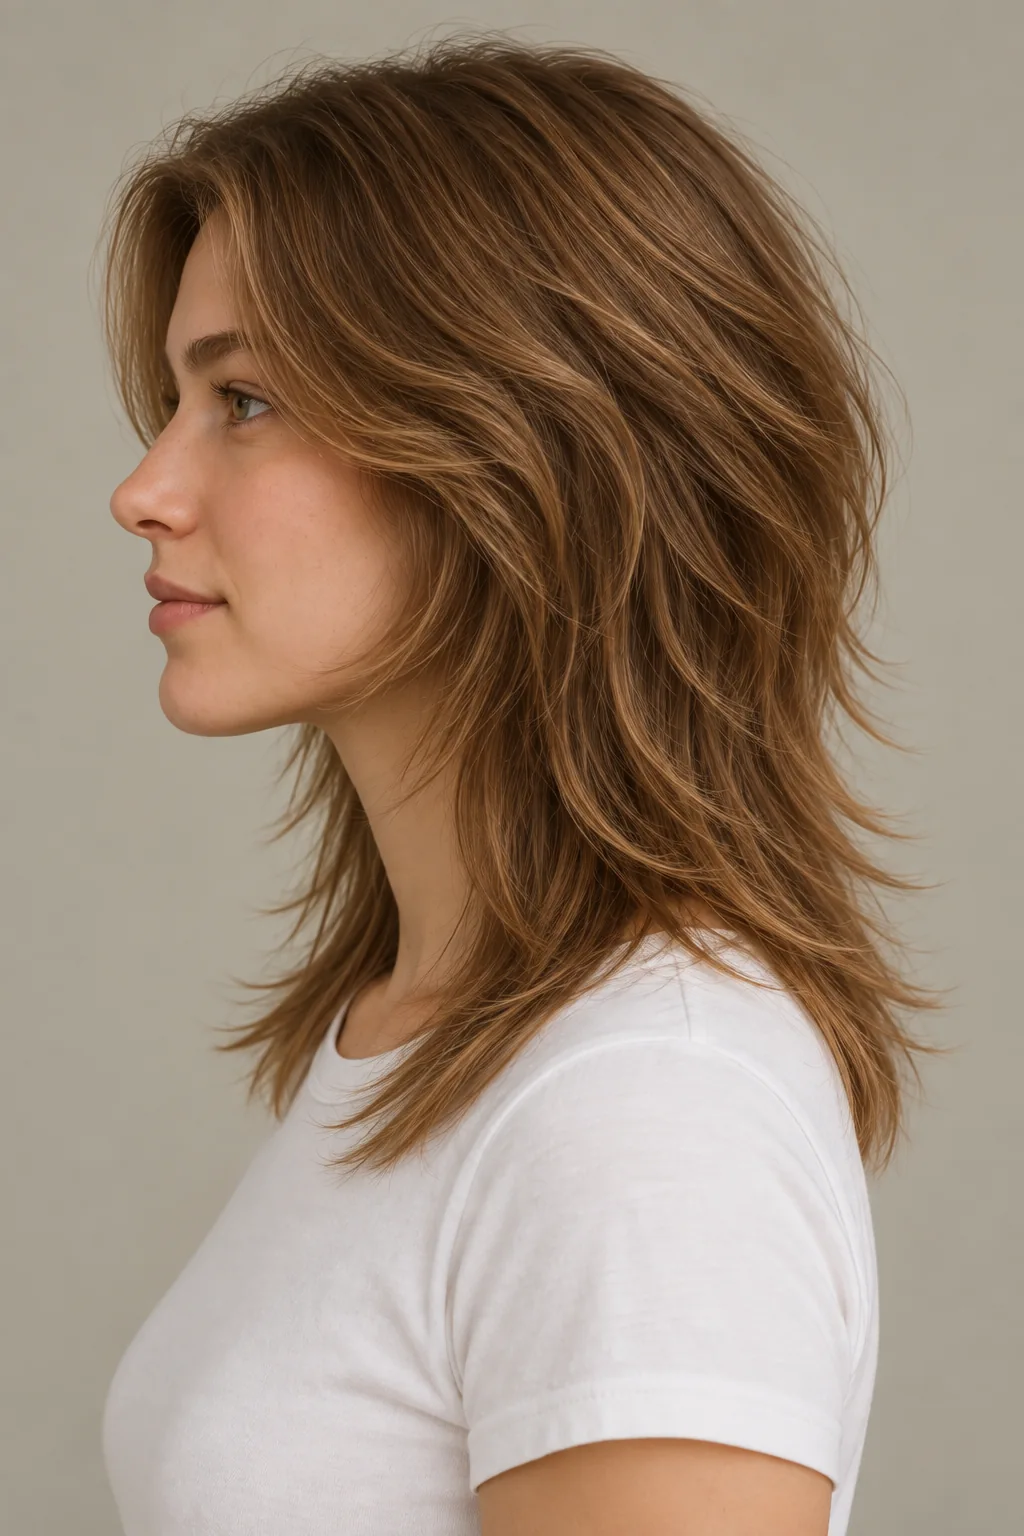
An octopus cut places a rounded layered shape above lighter, longer pieces. This version reaches the collarbones, with center-parted curtain framing around the cheeks and jaw. Its lower outline is deliberately narrower than the upper shape, but the transition stays textured rather than forming a solid shelf.
That difference in fullness is the main decision. You may like a pronounced rounded top and very separated ends, or prefer a quieter version with more weight retained below. Point to both areas in the reference so your stylist understands the balance you want, not just the name.
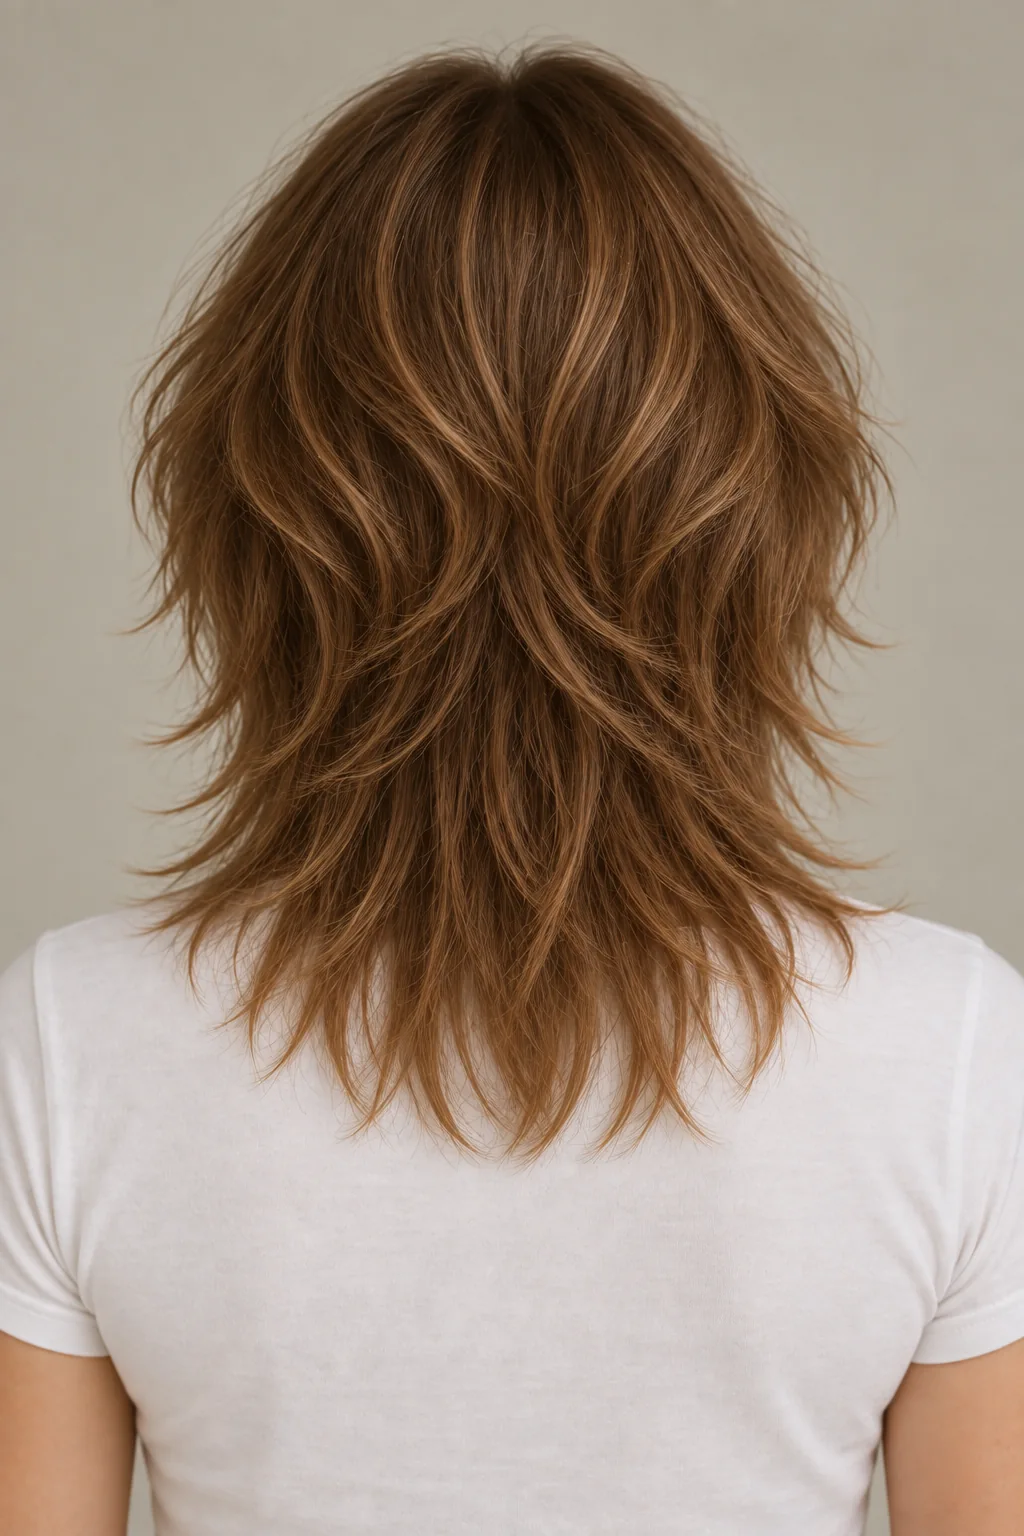
Fabio Scalia’s salon guide describes the stronger upper layer and lighter tapered lengths as purposeful contrasts, with framing and routine adapted to the individual. Use the side and rear images to discuss that structure before deciding where the shortest pieces should sit.
Reserve the lower hair before shortening the top
The fullness above and below comes from the same supply of hair. Ask your stylist to show which sections will remain long before the upper layers are cut. If the ends already look sparse, taking more hair away from them may move you farther from the result you want.
The reference’s piecey ends are intentional; accidental-looking thin tails are not the goal. Discuss the minimum fullness you want to see when the hair hangs naturally, without a product separating the pieces. A softer contrast can still express the idea without removing as much weight.
| What you want to understand | What to ask your stylist |
|---|---|
| How full the long outline remains | Can you show me the lower section before cutting the upper layers? |
| Whether the top becomes too wide | Where will its fullest point sit in my natural texture? |
| Whether fine ends can support the look | Would fewer or longer layers retain more of the outline? |
| How much separation is deliberate | Which pieces will be tapered, and which stay more substantial? |
| What happens when it is unstyled | Can we assess the density without shaping every end outward? |
Place the rounded shape around your own face
The front pieces in this reference begin around the cheeks and continue toward the jaw. Check them without the styled bend so you can see their actual dry length. Ask how they join the crown and side layers, and whether you want the same amount of volume at each point.
A strong crown growth pattern may lift a short section more than you expect. A wave near the ear may turn the side outward. Neither automatically prevents the haircut, but both affect the upper outline. Decide where you welcome movement and where you prefer a quieter shape before making those pieces short.
Avoid treating a face-shape label as a prescription for one layer height. Your preferred framing, ear coverage and everyday parting are more useful choices to explain.
Set the limits before the weight comes out
Less contrast, fuller lower ends or longer upper layers can change the commitment considerably. Select the requests you want in your salon card. These are consultation notes and do not alter the reference used in the AI try-on.
Judge both areas in their dry pattern
The rounded upper shape and the longer lower pieces may not shrink or bend by the same amount. For natural curls, plan their dry positions individually rather than stretching everything to match this reference. A curly interpretation is a valid shape to discuss, not a problem that has to be corrected first.
Straight hair may show a sharper difference between lengths when it hangs naturally. Waves may soften the transition or create more side width. Bring a photograph of your usual hair so your stylist can explain where the reference will differ from your everyday finish.
Style the balance rather than every separate end
Ask your stylist to demonstrate settling the upper layers and arranging the lower movement. You may want the rounded shape to stay clear without needing each tip to point outward. Explain whether you usually air-dry, diffuse or use a brush, and choose a routine that fits that preference.
If heat is involved, follow the tool instructions and use appropriate heat protection. If a product is suggested, ask what it changes: definition, hold or the way pieces separate. More product will not restore fullness if the lower hair has been cut too thin.
Test your usual tie as well. The longer ends may gather while the upper layers and curtain framing fall free. Decide whether clips are acceptable or whether some sections need to stay longer. Look at the loose upper shape with the back tied, since that may be the version you wear for work or exercise.
Plan the route back to a fuller edge
If you later want less contrast, preserve the shorter layers as they grow and selectively maintain the longest ends. Shortening the lower outline can bring the lengths closer sooner, but costs overall length. Keeping the longest ends means accepting a more gradual transition.
Letting every section grow untouched does not instantly erase their length difference. Repeating the original upper layering and tapering at every trim will preserve the very contrast you are trying to reduce. State the new goal clearly before a maintenance appointment.
For keeping the octopus shape, refresh when the upper balance or lower outline no longer sits as you prefer. The front may need attention at a different time from the longest ends. There is no universal trim interval that captures all densities, textures and preferences.
Include what must remain full
I’d like an octopus cut with rounded upper layers and a lighter collarbone-length outline. Please show me the shortest pieces and how much hair remains underneath before cutting. Keep the transition textured, preserve the fullness we agree at the ends and check the dry shape in my natural pattern.
Show the rear reference to agree the lower density.
Prepare my octopus cut salon card →Questions about the contrasting layers
How does it differ from the butterfly reference?
Here the lower outline is noticeably lighter than the rounded upper shape. The butterfly reference keeps a fuller long base. Names can overlap, so compare the actual density and layer transition you want.
Is it a jellyfish cut?
This version uses a textured transition rather than a blunt upper cap over a separate lower tier. Bring the side and back views to clarify that difference instead of relying only on trend names.
Do the lower ends turn outward automatically?
No. Their movement depends on natural texture and styling. The cut establishes the length contrast, not a permanent direction for every tip.