Agree on the outside length and the shortest layer
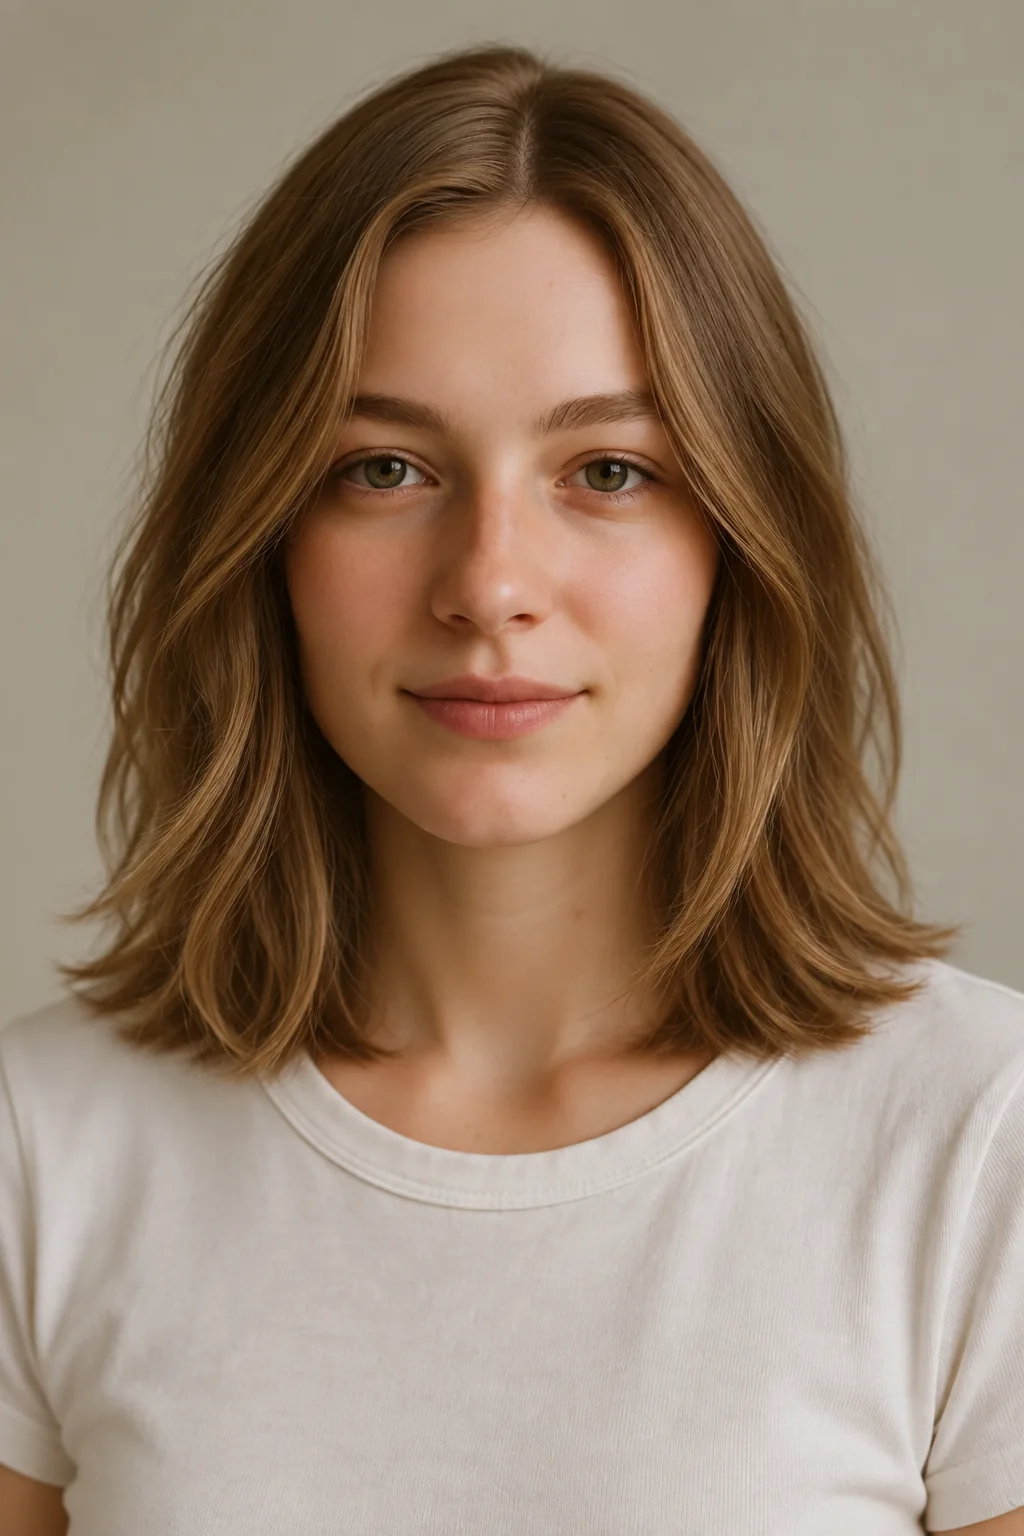
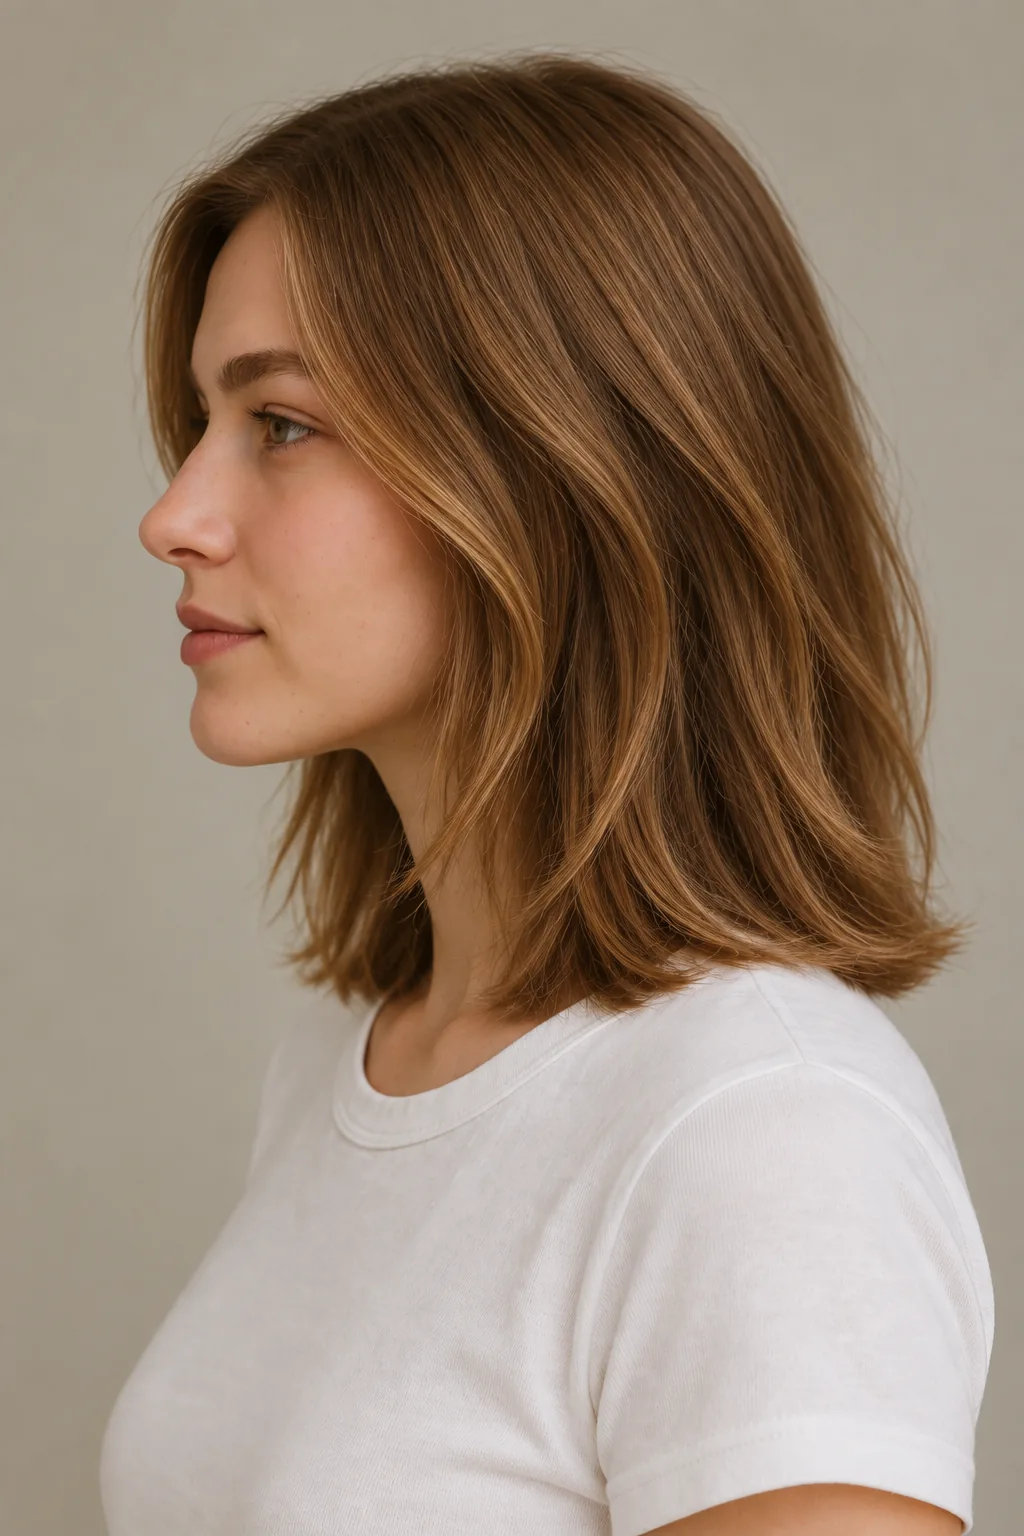
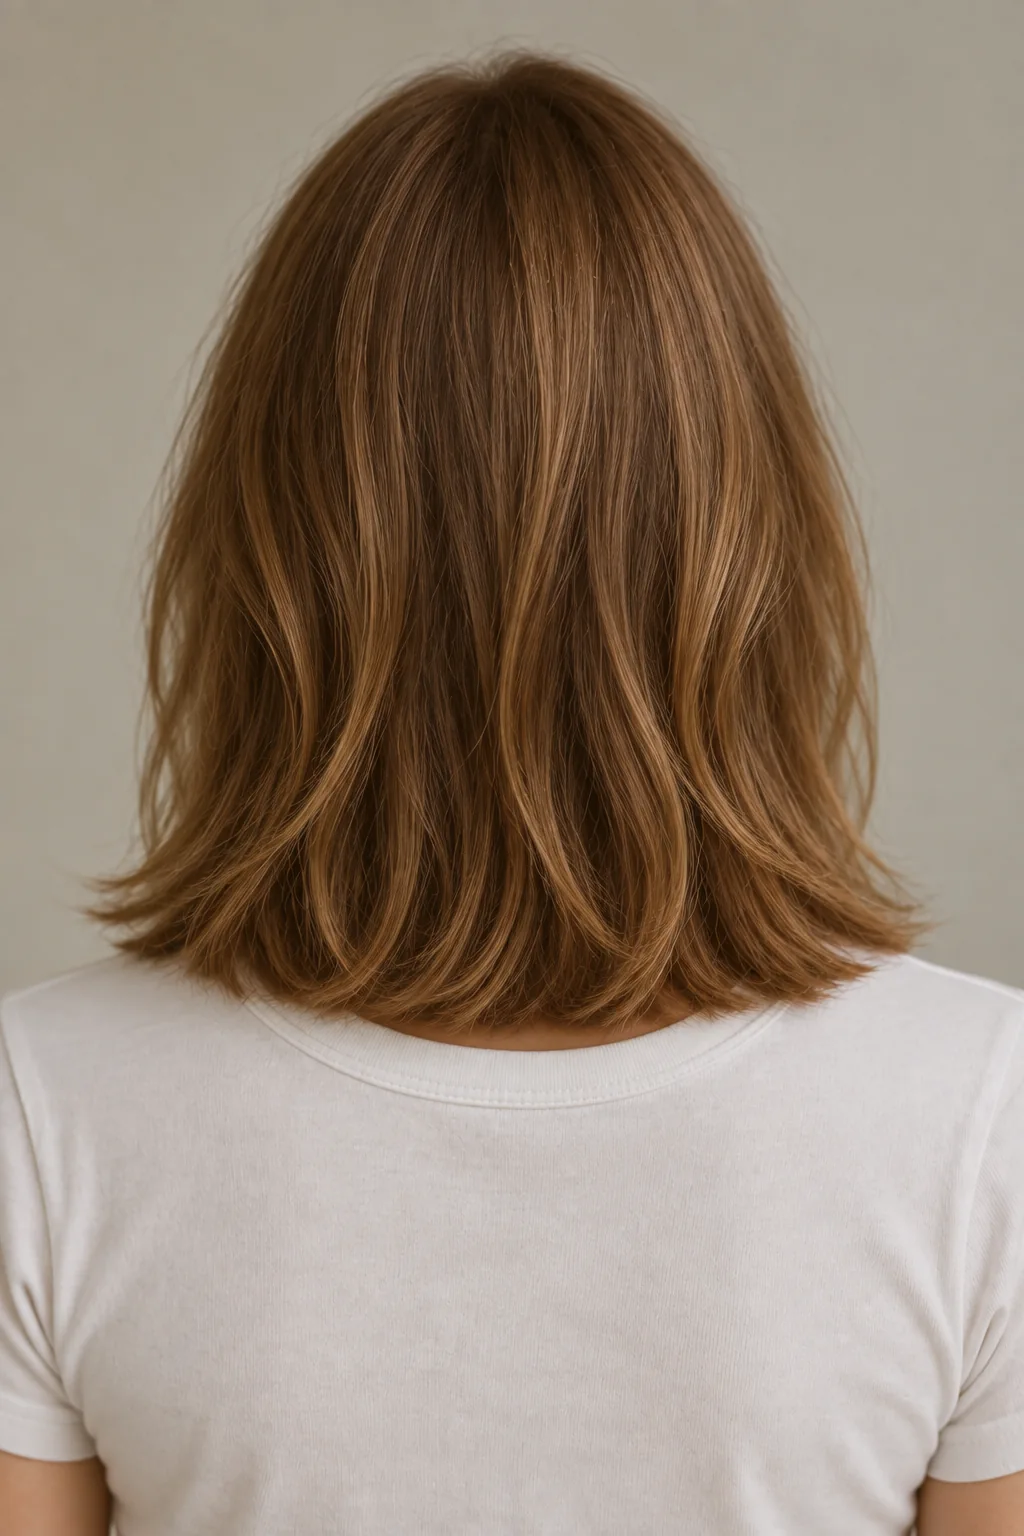
“Shoulder-length layers” leaves two separate decisions open. One is where the longest hair ends; the other is where the shortest sections begin. This reference keeps the outside line at the shoulders, with long connected layers concentrated lower down and face framing beginning below the chin. The crown stays long and quiet, without bangs or short shag sections.
Ask your stylist to show both lengths before cutting. You may be comfortable losing some length at the bottom while wanting to keep the front long, or you may want movement near the ends without changing the overall outline. Name those priorities separately.
Neal & Wolf’s shoulder-length guide, which credits education head Laura Elliott for insight, discusses shoulder-skimming lengths with optional layers and distinguishes them from shorter-crown shapes. Use the actual layer positions in this reference to explain your choice rather than treating every medium layered cut as equivalent.
See where the hair lands against your shoulders
The hair here genuinely reaches the shoulders. Check the proposed dry line from the front, side and back while standing or sitting in your normal posture.
At this length, contact with the shoulders can turn the ends outward or interrupt an inward bend. Clothing and head movement may change that direction during the day. Decide whether you like some of that movement before choosing a length that rests exactly at the contact point.
If you strongly prefer a quieter edge, ask to compare a slightly different landing point. That may involve keeping a little more length rather than adding more layers. Neither choice guarantees every end will face the same way, so judge the shape in the finish you actually expect to wear.
Keep the crown restrained and the base substantial
The movement in this version comes mainly from the lower lengths. It does not require a short crown, which could change both the silhouette and how much hair reaches the bottom. If your ends are fine or sparse, ask whether fewer layers would preserve more of the outline you want.
| What needs attention | What to agree with your stylist |
|---|---|
| Sparse lower lengths | How much hair remains at the perimeter after layering. |
| A crown that already lifts | Whether keeping it long avoids more height than you want. |
| Dense sides or back | Where weight can be adjusted without thinning the whole edge. |
| Existing short front pieces | Which parts can join the below-chin frame now and which need to grow. |
| Waves or curls | The dry position of the layers and the overall shoulder target. |
Density, strand thickness and condition are different considerations. Describe what you notice rather than assuming one label determines the haircut. A photograph cannot assess your density.
Specify what must stay long
A lower layer starting point, fuller edge or extra ponytail reach can be more important than copying every bend in the reference. Choose your discussion points below. These requests go to your salon card and do not modify the AI preview.
Test the front and nape, not just the longest ends
Shoulder length does not automatically mean every piece reaches a tie. The front sections travel farther to a low ponytail, while short nape pieces may fall out of a higher one. Try the actual position you use and identify which loose pieces you are willing to clip.
If a secure tie is essential for work or exercise, tell your stylist before the shortest layers are cut. Keep enough reach in the relevant sections rather than assuming a small change at the perimeter solves everything. An ear tuck is another useful check, especially if you keep the front out of your face throughout the day.
The reference’s subtle bends can make some pieces look shorter than they are. Test them hanging naturally as well as styled, so the decision is based on their actual reach.
Plan for the way you normally dry it
A gentle blowout brings out the lower layers in this image. It is one finish, not proof that the haircut will arrange itself that way after washing. Bring a photograph of your normal unstyled hair and discuss which areas you are willing to direct with a brush or dryer.
For waves or curls, choose the dry length and layer placement around your own pattern. You do not need to stretch your texture into the smooth reference to wear shoulder-length layers. For straight hair, expect less visible bending when you skip styling.
If heated tools are part of your routine, follow their instructions and use appropriate heat protection. Ask for a restrained method that shapes the ends without turning the whole style into large outward wings or a strongly curled-under outline. If you prefer no heat, assess the natural finish honestly before choosing the cut.
Refresh the outline or let the layers reconnect
Growth moves the outside line below the shoulders and shifts the front framing lower. You may like that softer stage. Refresh when the balance no longer suits you or the ends need attention rather than assuming the cut demands one fixed appointment interval.
If earlier layers were cut too short, a new trim cannot instantly restore their length. Decide whether to preserve the longest hair while the shorter pieces grow, or gradually shorten the lower edge to reduce the difference. Letting every section grow untouched does not automatically erase an existing gap in length.
Explain when you want fewer layers, not just shorter overall hair. Otherwise, repeating the original layering at each appointment will maintain the same separation you were hoping to soften.
Describe the two lengths in one brief
I want hair that skims my shoulders, with long lower layers and a full soft U-shaped back. Keep the crown long and the face framing below my chin. Show me the shortest section separately from the outside line, and check my usual ponytail before finalizing either.
Bring the rear view to establish the fuller perimeter.
Prepare my shoulder-length layers salon card →Questions about the layered outline
Is this different from a clavicut?
The terms can overlap. Clavicut primarily describes a collarbone landing point; this reference emphasizes shoulder contact and low connected layers. Specify both length and layering rather than treating the names as exclusive categories.
Does it need bangs?
No. This version keeps the forehead open and the front long. Bangs would be a separate change with different styling and securing needs.
Will more layers always create more volume?
No. Layers redistribute the hair and can reduce the fullness at the ends. Choose the amount for your density and the shape you want to retain.